You likely did fine if you applied a high‑potassium “winterizer” a few weeks after topgrowth slowed and before hard freeze, watered it lightly so granules moved into the soil, and calibrated your spreader to deliver about 1.0–1.5 lb N/1,000 sq ft or roughly 1–2 lb K2O/1,000 sq ft; if you used high‑N quick‑release or fertilized on frozen ground, expect weak spring response, and now we might consider a soil test, spring feed, aeration or overseed to fix it, and you can learn more.
Some Key Takeaways
- Apply a winterizer 2–3 weeks after topgrowth slows and before a hard freeze while soil still allows root uptake.
- Use a high‑potassium formula (K equal to or greater than N) to build roots and winter stress tolerance.
- Deliver about 1.0–1.5 lb actual N/1,000 sq ft and calculate product mass from the bag analysis.
- Calibrate your spreader, overlap passes 30–50%, and water lightly after spreading to move granules into the soil.
- Evaluate success by earlier spring green‑up, thicker roots, and reduced snow mold; adjust timing or K rate if results are weak.
When and Why a Winterizer Matters for Fall Lawn Health

When the topgrowth of your cool‑season lawn starts to slow in late fall, that’s the moment to act, because the grass has shifted from leaf growth to storing energy and building roots, and a properly timed winterizer helps lock in those benefits before the ground freezes. You’ll want winterizer fertilizer applied in late fall, usually a few weeks after growth slows, while soil temperatures still let roots take up nutrients, because the right mix — higher potassium and modest quick‑release nitrogen — promotes carbohydrate storage and root growth rather than more leaves. The key is aerating before you apply and lightly watering after, following application rates on the label, avoiding frozen ground, and asking local experts if you’re unsure. Consider choosing blends formulated specifically for winterizer fertilizer use to match your lawn and regional conditions.
How to Tell If You Applied Your Winterizer at the Right Time
You’ve already got the timing basics in mind from late fall applications, so now we might consider how to tell if that winterizer actually hit the mark, because knowing what to look for will save you from repeating mistakes next year. The key is observing soil uptake and root development: if you applied about 2–3 weeks after topgrowth slowed, while soil was still workable and before a hard freeze, nutrients moved into roots for carbohydrate storage, and you’ll likely see stronger spring green-up and heavier roots compared with untreated spots. If you fertilized on frozen or frosty ground, uptake was minimal and the fertilizer probably sat on the surface or washed away, so poor spring response signals mistimed fertilizer application and tells you to adjust your timing next season. Consider using high-nitrogen granules to support carbohydrate storage and root growth in late fall.
Checking Product Choice: Did You Use a True Winterizer Blend?
Now, let’s check whether the product you used was a true winterizer, because the key is a higher potassium ratio (the third number in the N‑P‑K mix) that helps roots and stress tolerance rather than pushing quick shoot growth. If your bag is a balanced 20‑20‑20 or a high‑nitrogen 46‑0‑0, it’s not the right choice and you’ll want a blend like 24‑0‑12 or 28‑5‑12, or anything labeled “winterizer/winterguard,” applied in late fall per the instructions. If your soil test already shows plenty of potassium or you’ve got warm‑season grass, now we might consider adjusting or skipping the winterizer, and reach out to a local pro for a tailored recommendation.
Higher Potassium Ratio
If you want your lawn to head into winter with stronger roots instead of a last-minute burst of top growth, the key is choosing a true winterizer blend that boosts potassium (K) relative to nitrogen (N), so look for fertilizers where the third number is as large as or larger than the first (for example, 5-0-15 or 10-5-20), because potassium helps water regulation, root growth, and disease resistance while excess nitrogen drives shoots instead of root hardening. Now, check the bag for high potassium or labeled winterizer, calculate the K2O rate so you deliver about 1–2 lb per 1,000 sq ft at fall application, and if your soil test shows adequate K you can choose lower potash, otherwise avoid high‑N mixes. Our product line focuses on formulated granular blends designed for winter lawn care to simplify fall applications.
Avoid Quick-Growth Formulas
When you’re picking a late‑fall feed, the key is to spot and avoid quick‑growth formulas that tempt you with fast green up but leave roots unprepared for winter, so check the label and make sure the blend favors potassium (the third number) over quick‑release nitrogen. You want a true winterizer Fertilizer that promotes root‑strength, not a high‑nitrogen, quick‑release product that sparks tender shoots and invites snow mold, so read numbers like 24-0-12 instead of 46-0-0. Now, we might consider the N rate, aim for moderate N for cool‑season turf, and the K percentage for carbohydrate storage, this is where a balanced bag labeled “winterizer” or “fall lawn food” helps. When in doubt, get local advice. For homeowners maintaining turf, choosing products from a trusted winterizer lawn food supplier ensures formulations designed specifically for root development and winter hardiness.
Proper Application Rate and Spreader Technique to Verify
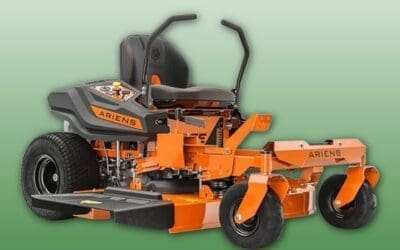
Now, we’ll get practical about the correct application rate, because the key is hitting roughly 1.0–1.5 pounds of actual nitrogen per 1,000 sq ft, and you’ll figure that out by measuring how many pounds your spreader lays down and using the bag’s analysis to calculate nitrogen delivered. This is where spreader calibration comes in: run your broadcast spreader over a measured 100 sq ft (or do a bag catch test) at each setting to see the pounds applied, adjust the setting so the math matches your target, and follow the bag’s recommended setting while always verifying by calibration. Once you’ve broadcast at the right rate and overlapped passes about half a swath to avoid streaks, water lightly (about 0.1–0.2 inches) to wash granules in, and don’t exceed the recommended rate or you’ll risk burn and runoff. Use basic spreader calibration tools to make measuring and adjusting quicker and more accurate.
Correct Application Rates
Because getting the right amount of nitrogen is what separates a helpful winterizer from a waste of money, you’ll want to aim for about 1.0–1.5 pounds of actual nitrogen per 1,000 square feet and then work backward to figure how much product that means for your spreader, so you don’t over- or under-apply. For Winter Fertilizer applied late, the key is calculating product by dividing desired N by the bag’s percent N, so with a 32‑0‑7 you’d apply roughly 3.1–4.7 lb product per 1,000 sq ft to deliver 0–1.5 lb N, and with high‑N urea you cut mass accordingly. Now, we might consider steady walking, overlapping passes about 30–50%, and a light 0.1–0.2 inch watering to move nutrients into the soil. Homeowners often prefer granular products because they provide steady release of nutrients and are easy to apply with standard spreaders.
Spreader Calibration Steps
If you want the fertilizer to actually do its job instead of sitting in clumps or washing away, the key is calibrating your spreader so you deliver the exact pounds per 1,000 square feet the bag recommends, and this is where a short, hands-on check will save you time and money. First, check the label for the target rate in lbs per 1,000 sq ft, calculate your lawn area, and set the spreader using the manufacturer’s chart, now we might consider a test area if settings don’t match. Fill the hopper, run two known-width passes at a steady walking speed, collect the product applied to confirm the rate, adjust, and repeat; remember 25% overlap for broadcast units, straight flush passes for drop spreaders. Choosing the right compact spreader can make calibration simpler and more accurate, especially for homeowners who maintain smaller lawns and landscapes, so consider a model suited to your yard size and needs compact spreader.
Did You Pair Aeration, Overseeding, or Preemergent Correctly?

When you’re getting ready for a winterizer application, the key is pairing it correctly with aeration, overseeding, and any preemergent work so you don’t undo the benefits you’ve paid for, and that starts with doing core aeration first so those tiny holes let the late-fall fertilizer reach the root zone and improve uptake. You’ll want to mow and clear debris, aerate, then overseed if needed, this is where a starter fertilizer or a reduced-rate winterizer helps seedlings without burning them, now, we might consider a preemergent only on non-seeded areas or use seed-safe preemergents when seeding; wait about four to six weeks before heavy feeding, and remember, timing and compatible products keep your lawn healthy and whole.
Watering After Application: How Much and When It Matters
Though the calendar tells you it’s fall, the key is how you water after a winterizer so those nutrients actually reach the roots instead of sitting on leaves or washing away, and you’ll want to act promptly but carefully. You should water immediately after spreading granular winterizer, about 0.1–0.2 inches (roughly 0.5–1 gallon per 100 sq ft), to dissolve granules and move food to the root, and if you used a liquid, irrigate lightly within 24 hours to wash product off leaves into soil. The key is to avoid runoff, don’t apply before a hard freeze, and only treat soil when it’s workable and slightly moist. If more moisture’s needed, split watering into short cycles, then water only as needed.
Spring Signs That Your Winterizer Worked : What to Look For
You watered carefully in fall, so now you’ll be watching for the payoff in spring, and the key is to know what signs actually mean your winterizer did its job. You’ll first notice earlier spring green-up, about one to two weeks sooner than untreated spots, which tells you stored carbohydrates and that 1.0–1.5 lb N/1,000 sq ft did its job. Now, we might consider digging a small 2–3 inch soil core to check roots, thicker fibrous roots mean deeper rooting and better winter survival. This is where fewer brown patches, less snow mold, and more uniform turf cover show strong early recovery, and the lawn resists water stress better. Take pride in your fall care, you’re part of a neighborhood keeping lawns healthy.
Quick Fixes If Your Winterizer Was Applied Late, Light, or Wrong
If your winterizer went on late, was applied too lightly, or simply wasn’t the right mix, don’t panic — you can still get the lawn back on track with a few targeted spring moves, and the key is to diagnose what went wrong quickly so you can match the fix to the problem. Start by checking signs in early spring, then plan a follow-up application if a late application didn’t absorb, supplying 0.5–1.0 lb N/1,000 sq ft to jump‑start recovery. If the feed was light, overseeding and aeration will help, followed by a starter fertilizer when seedlings emerge. If potassium was low, apply a potassium-rich product at label rates, and if mix confusion occurred, get a soil test to guide reduced spring N and next season’s timing.
Some Questions Answered
When Should Winterizer Fertilizer Be Applied?
About 80% of root carbohydrate storage happens in late season, so you should apply winterizer in that window. You’ll watch soil temps and root growth, aim for the timing windows from Halloween to Thanksgiving regionally, and apply the right application rate when topgrowth has slowed but ground isn’t frozen. Now, we might consider rain forecasts and aeration first, this is where slow‑release options help if you’re late, so act confidently.
How to Apply Scotts Winterizer Fertilizer?
You apply Scotts Winterizer by first doing a soil test, then timing the application for late fall when growth slows; calibrate your spreader to the bag rate, this is where even coverage matters. If you aerated, apply afterward for better uptake, and water lightly after application to move nutrients into roots. Store fertilizer dry and sealed, follow safety precautions like gloves and keeping kids/pets away, and expect stronger roots by spring.
What Is the Best Winterizer Fertilizer for Fall?
Think of fall fertilizer as a warm coat for your lawn: you’ll want a winterizer with balanced nutrient ratios, higher potassium, and some slow release nitrogen. Start with soil testing, now, we might consider granular vs liquid options based on ease and timing, this is where brand comparison helps — choose a reputable mix (e.g., 24-0-12), follow seasonal timing, apply with a spreader, water lightly, and expect stronger roots by spring.
Is It Better to Put Fertilizer on Wet or Dry Grass?
You should mostly apply fertilizer to dry grass, because dry turf helps even spread, reduces pathogen risk, and limits evaporation loss; now, we might consider light watering after application to enable soil moisture and turf uptake, the key is timing—wait until grass is dry so granules don’t stick, then irrigate gently so fertilizer activation happens without nutrient leaching, and sweep off any stuck granules if you accidentally broadcast on wet blades.