Walk the yard with purpose, noting low spots where water pools over 24–48 hours, thin or bare turf, compacted soil (probe with a screwdriver), clogged gutters or downspouts, and rodent runways under shrubs; check for snow mold or crown-rot signs like matted, straw-colored patches; measure mulch depth and pull it from trunks, inspect branches for splits or overhangs, and winterize hoses and backflow devices. Prioritize fixes—drainage, aeration, overseeding, pruning—and keep going to learn practical timing and techniques.
Some Key Takeaways
- Walk the property after thaw or rain to map persistent puddles, low spots, and downspout discharge causing pooling.
- Probe soil with a screwdriver to detect compaction; resistance beyond 2–3 inches indicates need for aeration.
- Inspect turf for bare patches, thinning, footprints that don’t spring back, and areas needing overseeding.
- Check for snow mold or crown rot after melt—matted, straw-colored patches or slimy crowns require documentation and treatment.
- Clear gutters and ensure downspouts discharge 3–6 feet from foundations to prevent runoff and foundation-saturated soil.
Walk the Property and Note Trouble Zones
When you walk the property after a rain or a thaw, take your time and look for trouble zones where water lingers, soil’s compacted, or turf is thin, because those spots will show you exactly where winter will cause the most damage; note any low areas or ruts where puddles stick around longer than 24–48 hours, mark thin or bare patches bigger than a dollar coin for priority overseeding or aeration in spring, and pay close attention to slopes, swales, and downspout discharge points for signs of erosion or exposed roots where mulch has washed away. Now, as you walk the property, map drainage issues, photograph clogged gutters or shifted hardscape, and flag dead or damaged limbs over paths, then clear leaves regularly so issues stay visible. Consider planning targeted fixes like installing French drains or regrading to improve runoff and prevent future pooling by following proven lawn drainage strategies.
Look for Bare Patches and Thinning Turf
Now walk the lawn and mark any bare patches larger than a hand-span, because those spots often mean winter kill, disease, or insect damage and need targeted fixes. The key is to check turf density by parting grass over a 6‑inch square—if shoots are sparse for your grass type, you’ve got thinning—and to probe the soil with a screwdriver or probe to see if compaction or thin topsoil is the underlying problem. If you find hard, compacted soil or less than a couple inches of healthy topsoil in those areas, plan aeration or topdressing now so new growth has room and nutrients to recover. Consider adding stone border materials around problem areas to help define beds and reduce foot traffic that can worsen compaction.
Identify Problem Areas
Start by walking your lawn at a steady pace, parting the grass with your fingers and looking closely for bare patches and thinning turf, because spotting trouble early makes repairs simpler and more effective. As you go, note bare patches larger than a few square feet and whether they follow pet paths, high-traffic routes, or shade, since that tells you if wear or shade is the culprit, and measure turf density over a 6-inch square, fewer than 20–30 shoots means overseeding’s needed. Watch for discolored rings or areas that trace drainage channels or low spots, this is where standing water harms roots, and inspect edges for gradual loss that often signals soil compaction or mechanical stress. Mark problem zones on a map or photo so you can prioritize fixes. Also consider which bare spot repair products and techniques will best match each problem area so you can plan materials and timing.
Inspect Soil Compaction
Probe the soil to see whether compaction’s the hidden cause of your bare patches, because firm, pressurized ground chokes roots and thins turf faster than you might notice from above. Start by grabbing a screwdriver or soil probe and pushing it in—if it needs more than 2–3 inches of force, you likely have compacted soil limiting root depth, and that explains thinning in high-traffic or poorly drained spots. Now check after a thaw or rain, watch for standing water over 30 minutes or quick runoff, this is where poor infiltration signals trouble. Gently lift a turf square to compare hard, cloddy soil with short, matted roots against friable soil with fibrous roots, then plan aeration or core sampling to restore pore space. Consider using mechanical aerators or core samplers to relieve compaction and restore pore space for healthier roots.
Check for Compaction and Water-Pooling Areas
Now walk the lawn and look for footprints or ruts that don’t spring back, because those are clear soil compaction signs that choke roots and cut oxygen, and if you can’t push a screwdriver more than 2–3 inches it’s time to aerate. This is where you also note low spots and areas near downspouts or driveways that hold water for 24–48 hours, since poor drainage pockets will suffocate turf and invite disease. The key is to map and photograph recurring wet or compacted zones now, so you can prioritize aeration, grading, or drainage fixes come spring. Consider planning targeted fixes like installing perforated drainage to remove standing water and protect turf health.
Soil Compaction Signs
When soil gets compacted it chokes root growth and you’ll usually see the effects first on the surface, so walk your lawn with a careful eye and a probing tool; the key is to link what you observe aboveground—thin, yellowing turf, bare spots, and an excessive thatch layer (more than about half an inch)—with what’s happening below. Check for shallow root systems by gently pulling a grass tuft or probing 3–4 inches with a screwdriver, if it takes more than 10–15 seconds to penetrate you’re likely facing compaction, now note where poor drainage or temporary standing water appears after rain, this is where heavy traffic has squeezed the soil and raised bulk density. If you spot these signs, mark zones and plan aeration and traffic reduction to restore root depth. Incorporating quality soil conditioner granules can help improve soil structure and promote healthier roots by reducing compaction and enhancing drainage soil conditioner granules.
Poor Drainage Pockets
You’ve already been looking for compacted zones by checking root depth and how quickly a screwdriver sinks, and the next thing to watch for is where water actually sits on the surface, because poor drainage pockets often point to the same compaction problems you just inspected for. Now walk the lawn after a storm or melt, note where water pools for more than 24 hours, and probe soggy spots with a screwdriver or soil probe; if it’s hard to push in more than 2–3 inches, soil compaction is likely, limiting roots and infiltration. This is where you’ll see bare or thin turf, depressions near downspouts, or muddy footprints, and the key is aeration, grading, or added drains to restore healthy growing conditions. Consider installing lawn drainage emitters to direct standing water away from problem areas and improve surface drainage.
Inspect for Disease and Snow Mold Signs
Although snow-covered grass can look harmless, inspecting for disease and snow mold as soon as the snow melts will tell you whether the damage is temporary or needs active repair, so start by scanning the lawn slowly and deliberately for telltale patterns. You’ll look for circular patches from 6–12 inches to several feet across with matted, straw-colored turf or grayish mycelial growth — classic snow mold — and in prolonged wet cool spots you may see water-soaked blades or a cottony white or pinkish mat that signals gray snow mold or pink variants. Check crowns and thatch for slimy, rotten tissue and foul odor, since crown rot pulls shoots out easily. Note where snow insulated the soil, photograph severity, and record nearby moisture to guide raking, drainage fixes, or targeted fungicide care. Consider using preventative snow mold fungicides on susceptible lawns before prolonged snow cover to reduce future outbreaks.
Scan for Pest Damage and Rodent Tunnels
After you’ve checked for snow mold and crown rot, don’t stop at fungal symptoms — now look for signs that critters have been using your lawn as a run or pantry. Walk perimeter areas, under shrubs, and near compost, scanning for vole and mouse tracks, small dark droppings, chewed blades, and clipped vegetation that mark surface runways and feeding. Probe gently for 1–3 inch burrows and feel for tunneled soil or soft collapsible tunnels under leaf litter, this is where voles push soil into tiny mounds. Note clustered dead or thinning grass in 1–2 foot patches with visible soil disturbance, take photos, and record locations and sizes. The key is documenting severity, so you can plan targeted controls before spring green-up.
Assess Mulch Depth and Plant Bed Coverage
Start by stepping around your beds and tree rings with a trowel or ruler in hand, because consistent mulch depth is one of the simplest winter defenses you can apply; aim for 2–4 inches of mulch to insulate roots without smothering stems or crowns, and pull it back 1–2 inches from trunks and perennial crowns to keep moisture and rodents from congregating at vulnerable bases. Now, check for thin or washed-away spots where mulch has settled below about an inch, refresh those areas to restore even coverage, and avoid piling material against foundation walls or drainage swales where moisture gathers. The key is also to feel the mulch, if it’s fine and compacted replace with fresh chips or shredded bark to restore insulating air pockets.
Examine Trees and Shrubs for Broken or Hazardous Branches
When you walk the property now, give each tree and large shrub a slow, deliberate look from several angles, because catching broken or hazardous branches before winter storms arrive can save you time, money, and a lot of risk; spot limbs with visible splits, cracked bark, or jagged ends and mark them for pruning, listen for hollow-sounding branches by tapping with a pole to find deadwood that’ll snap under snow load, and pay special attention to limbs that rub against each other or the trunk since those wounds invite disease and will only worsen. Now, check for deadwood and inspect branch unions and the trunk flare for decay or fungal fruiting bodies, note large overhanging limbs near structures or walkways, and decide whether to prune or remove—this protects your shared space and gives you peace of mind.
Verify Gutters, Drains, and Slope Drainage Paths
Now’s the time to check your gutters and downspouts, because clogged channels can hold 75–100% debris and send water pooling toward your foundation; clear leaves so water flows freely away from the house. Next, make sure downspouts discharge 4–6 feet from the house or into a working splash block or extension, and confirm surface grades slope away at about 2% for at least 10 feet to prevent basement seepage and turf stress. Finally, walk the yard after heavy rain to spot ponding or blocked swales and clear debris from catch basins and yard drains so outlets stay open and you avoid erosion or winter ice buildup.
Clean Gutters Regularly
Regularly check your gutters and drainage paths, because clogged or misdirected water is one of the quickest ways to hurt your lawn and foundation; the key is to remove leaves and debris in late fall and again after heavy leaf drop so you never allow that 1–2 inch buildup that can weigh down gutters and lead to overflow. You’ll Inspect gutters and look for sagging or separated sections, now clear out debris so water flows freely, and test that downspouts actually direct water away instead of dumping at the foundation; this will prevent pooling and reduce soil saturation near turf. This is where gentle repairs, splash blocks, and post-storm walks through low spots pay off, noting areas to fix before spring.
Check Downspouts & Slopes
You’ve already cleared leaves and checked gutters for sagging, and now it’s time to make sure water actually gets carried well away from your foundation; this is where downspouts, extensions, and proper slope matter most. Walk the perimeter and confirm downspouts extend at least 3–4 feet or connect to splash blocks or buried drains, repair any crushed or separated sections before freeze/thaw makes things worse, and make sure gutter outlets are clear so runoff flows freely during thaws and heavy rain. Check grade slopes, aiming for about a 5% slope (roughly 6 inches over 10 feet), and inspect slope drainage paths for rills or erosion, adding swales, rock channels, or erosion fabric where runoff’s concentrating to protect your yard and home.
Review Irrigation, Hoses, and Outdoor Faucets for Winterization Issues
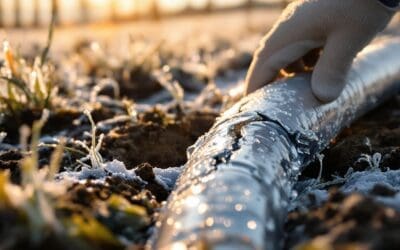
As temperatures dip toward freezing, take a few deliberate steps to winterize your irrigation, hoses, and outdoor faucets so you don’t end up repairing cracked pipes or a ruined sprinkler system in spring; start by disconnecting garden hoses and draining them, shut off and drain any exterior isolation valves, and open the outdoor faucets to let trapped water escape, because even a small pocket of water can freeze, expand, and split metal or plastic components. Now, check and disconnect garden hoses, drain and store them indoors, and inspect faucet threads and hose bibs for corrosion or leaks, replacing worn washers if needed; this is where you insulate exposed backflow preventers and vacuum breakers, or blow out irrigation lines with compressed air, or hire a pro to avoid busted emitters.
Record Findings, Prioritize Repairs, and Schedule Spring Tasks
When you finish the walk-through, take time to record exactly what you found so you can turn scattered notes into a clear, prioritized plan; note the location, size in square feet, and severity (minor, moderate, or severe) of any bare spots or thinning turf so you can weigh their impact, photograph drainage problems with a date stamp and record pooled depth and slope direction to justify grading or drains, and log damaged trees or hazardous limbs with GPS coordinates or visible landmarks so you can assign an urgency level for pruning or removal. Now, record findings in a single file, prioritize repairs by safety and turf loss, estimate costs, schedule spring contractors for aeration, overseeding, or grading, note where to mulch around beds, and set dates.
Some Questions Answered
What Yard Work Should Be Done in the Winter?
You should focus on snow removal, holiday cleanup, tree pruning, and ice management so your yard stays healthy and safe; now, clear walkways and roofs after storms to prevent damage, tidy decorations and remove debris from beds, prune dead or crossing branches to reduce winter breakage, and treat slick spots with sand or calcium chloride for ice management; the key is consistent attention, photos of problem areas, and gentle prep so spring recovery’s faster.
What Should You Put on Your Lawn in the Winter?
You should put a late-season winterizer fertilizer, light soil amendments like compost to improve texture, and overseed where thin to aid seed germination before dormancy, now while roots can still grow. Rake leaves and use winter mulching to protect crowns and reduce snow mold risk, this is where careful timing matters. Water deeply if dry, aerate if compacted, and trust that these steps boost spring recovery.
What Is the Correct Order of Lawn Care?
Start by mowing, raking, and clearing debris so sunlight reaches the turf, then soil testing to guide nutrients; now aerate to relieve compaction and overseed so seed contacts soil, this is where winterizing fertilizer (high potassium) helps build roots. Next adjust final mowing height, irrigate deeply before freeze and complete irrigation winterization. Finally, do mower storage and tool maintenance, so your gear’s ready and your lawn wakes up strong.
What to Expect From a Lawn Care Service?
You should expect clear service frequency details, honest communication expectations, and a written plan for regular tasks like winterizer fertilizer, aeration, leaf cleanup, and irrigation winterization, now this is where the team’s experience shows. They’ll explain emergency responses for sudden damage, confirm equipment access needs, and note drainage or pest issues, then schedule follow-ups, so you’ll feel included, informed, and confident about next steps.